Beatriz's Teaching Portfolio
  • Home
  • Background Information
    • Curriculum Vitae
    • References
    • Professional Development >
      • IH Certificate in Teaching Business English (June 2013)
      • Digital Storytelling for Teachers (May 2014)
    • About the University of Georgia
    • Syllabus Description and Grades
    • My work at the University of Georgia
  • Blog
  • Resources
    • Math
    • General English
    • Digital Storytelling
    • Creative Commons
  • Contact form

Phonics for English Language Learners (group 1)

8/12/2012

0 Comments

 
In this section, I am going to introduce the kind of activities and games that I carry out with my 4 year-old students. I only have 30 minutes of class three times per week so it is important that students are engaged in the classroom in order to produce as much output as possible from them. When I started teaching this class I didn't have any curriculum to follow so I designed my own lesson plans getting resources and ideas from the internet and books. In one of these attempts of finding interesting activities for my students I came across with the "Jolly Phonics" method. 

This method is thought to teach phonics to native speakers of English but I consider that it can also be implemented in ESL classrooms. I believe that in order to follow it, teachers need to spend around 10 hours per week applying this method.  Since I only have 1h 30 mins per week, I cannot get the same outcome as if I had 10 hours, but I am happy with the results :)

Here is a description of how I use "Jolly Phonics" to support my teaching. 
1. Teach one sound per week (group 1: s-a-t-p-i-n/ 2 months)
2. Each week, review the previous sounds so students do not forget them.

3. Sing the letter song
4. Realize picture worksheet and tracing worksheet
5. Play games

Lesson plan (example /a/)
1. Introduction to the new sound.

  - Show how the letter looks like
  - Say that it sounds like "a, a, a". Let the students repeat it.
  - Show around 5 pictures that represent words that begin with the /a/ sound ( not with the letter a). For example: "apple", "ant", "arm", "astronaut" and "alligator". Say the word at the same time as you show the flashcard.  Let the students repeat the word. Make sure students hear the /a/ at the beginning of the sound. Show the flashcards several times to helps students remember the vocabulary. 
2. Review of previous sounds and vocabulary.
3. Introduction of the song
  - Sing the song of the /a/ sound. Play several times and help students remember the lyrics and movements.

4. Picture worksheet or tracing worksheet.
  - Students sit down on their chair and work on their worksheet. One day I do the picture worksheet and another day the tracing worksheet. They listen and sing the song as they color and trace.
5. Phonics/ Vocabulary games: 
We play one or two of the following games per day depending on how much time we have left.
  1. Letter race:
  - Divide students in two groups.
  - Place the letters that they have learned and some that they have not learned yet on a table.
  - The first student in each team will start playing. They shake hand before starting.
  - Say a letter sound. Eg. /a/
  - Students have to go to the table and look for the letter that makes that sound.
  - If they get the right one they give it to you. If they get the wrong one, they can try again     

until they find the correct one. Give students as many opportunities as they need. Always 
recognize students' effort.
  - Don't make the game a competition. Tell students that the most important thing is to find 
the right letter; how fast you find it is not important.
  2. Picture race:
It has the same rules as the "letter race" but the teacher will say a word such as "apple" and students will have to pick up that word.
  3. Letter/picture race:
This variation of the previous games is suitable for more advanced students. The teacher will say a letter sound and student will have to find a picture whose name begins with that letter sound. You can also play the other way round. You can say the word and students will have to find the initial sound of that word.
  4. Lucky dip: 
  - Students sit down in a circle

  - Put some pictures and letters in a bag or box.
  - Ask students to pass the bag to each other at the same times as they say "pass"    

and while the music is on.
  - When the music stops, ask the child who has the box to close his eyes and open it. The 
student will get a picture or letter and will have to say the name or the sound. 
  - If the child is correct, he will keep the picture. If he is wrong, he will put the picture into the 
bag and the game will continue.
  - Play until there are not more flashcards left.
  5. Bingo:
I created a bingo set with pictures and letters that belong to group 1 (s-a-t-p-i-n).

0 Comments

A fun way to review the present continuous (young learners)

7/12/2012

0 Comments

 
This activity is great to introduce the present continuous in a new school year. It is also an excellent way to review essential vocabulary such as daily routines and food. I have carried out this activity with students who have a slight idea of the present continuous' pattern so it works as a review of it very well.

For this activity you will need:
 1. Flashcards with verbs (words) : dance, sing, have a shower, sleep drink, eat .... (daily routines).

 2. Flashcards with animals (pictures or words): giraffe, owl, cat, dog, bear ....
 3. Flashcards with food or drinks: water, orange juice, pasta, pizza, muffin...

Instructions: 
 1. Divide the flashcards in three groups according to their category (verbs, animals, and food and drinks).

 2. Let each student choose one flashcard from groups 1 and 2. In case they pick "eat" or "drink" they will also pick a flashcard from group 3. 
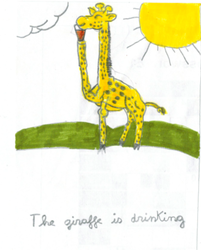
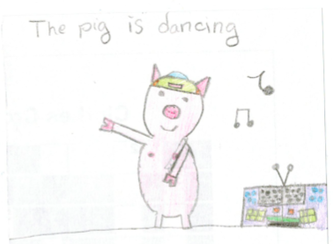
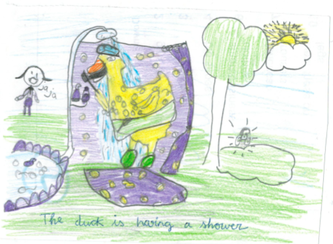
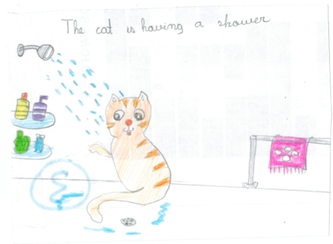
 3. Students will represent the combination of flashcards and will write the a sentence in the present continuous. If they picked "bear", "eat" and "pasta", they would represent and write "the bear is eating pasta".
 4. Do the activity first in front of the students so they can see what exactly they are expected to do.
 5. If necessary (depending on your students' age) go around and check which flashcards they got and write the sentences on the blackboard so they can copy them.

 6. The final result is so lovely! Check my students' work below!

0 Comments

Teaching "I like" and "I don't like" to young learners

6/12/2012

0 Comments

 
Teaching "I like ______" and "I don't like _______" 
1. "YES" and "NO" game:
 1. Tell students that the left side of the classroom corresponds to the  

answer "NO" and the left side corresponds to the answer "YES". 
 2. Ask students to stand up and go to either side of the classroom.
 3. Ask students a question that follows this pattern: "Do you like...   

apples?" If the answer is positive they will have to run to the "YES" side  
and if the answer is negative they will run to the "NO" side.
 4. Once each student has chosen one option, you will point at one side and 
students will have to say all together a complete answer following this pattern:  
"I like apples" or "I don't like apples". Then you will point at the other side.

 5. You can play several times. 
 6. You can use different verbs such as "to be" or " to have" once they have learned 
the pattern.

Teaching "I like it" and " I don't like it" 
I have done this exercise with my four year-old students and they just love it.
 1. You will need to prepare these materials: 
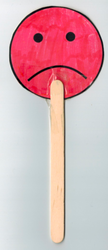
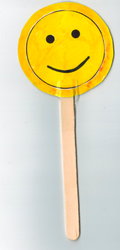
   - Ice-cream sticks, happy faces and sad faces made of paper (one for each       
     student)
   - Tape
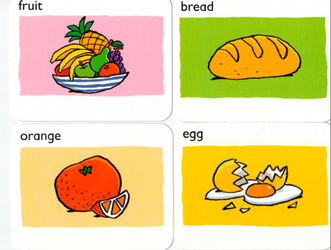
   - Flashcards with pictures of food (see example) 
 2. Students will color the happy face in yellow and the sad face in red.

 3. You will build up the craft of each student using some tape to stick the faces to the ice-cream stick. (see example).
 4. Students will sit down on the floor with their sticks and they will be ready to   
listen to the teacher's instructions.
 5. The teacher will pick up a flashcard and will show it to the children saying: "Do you like ________?"
 6. Students will answer to the answer raising their craft and showing the happy  
face if the answer is affirmative and saying " yes, I like it" or they will show the 
sad face if the answer is negative, at the same time as they say " no, I don't     
like it".
 7. Repeat several times.


0 Comments

Activities to teach spelling to young learners

6/12/2012

0 Comments

 
I would like to present some of the games and activities I usually carry out during my  ESL classes to help students learn the spelling of words they just learned. I have tried these games with students who are in 3rd, 4th and 5th grade but I consider that they can also be implemented with students who are a little bit younger or older. Some of these activities require moving around the classroom and standing up, so depending on the age of the students and classroom setting, the lesson can be more or less successful.

PD. Before I play the games, I tell them that we are going to practice the spelling of the new vocabulary so it will be easier for them to know how to write the words in order to win the game. I let them read and review the vocabulary on their own for 2 or 3 minutes. After that time, they are ready and willing to play and have fun.


1. ABC game:
I only carry out this game during the first weeks of school when students do not feel very comfortable saying the ABC. Students stand up and the stay behind their desks. In case of having a small group, children can form a line with their backs on the wall.
  
 1. The student who is on the left side or is the first on the line will start saying the first letter  
     of the ABC.
 2. Then, the next student will say the following letter of the word and so on.
 3. If a student says the wrong letter or repeats the same letter, they will be out of the game   
     too and must sit down.

2. Sparkle: 
 1. The teacher reads one spelling word aloud. 
 2. The student who is on the left side of the classroom or the first in the line will start the   
     word by saying the first letter.
 3. Then, the following student will say the next letter of the word and so on. 
 4. When the word has been spelled correctly, the next student in line says "Sparkle." 
 5. Those students who are next to the student who has said "Sparkle" will be out of the 
     game (luck plays an important role). 
 6. If a student says the wrong letter, they will be out of the game too and must sit down.
 7. The student who wins will get a "life" that can be use when someone who is next to them 
     says "Sparkle" . However, the "life" cannot be used when the student misspells the word. 

3. Spell it out and guess: 
This is a good activity to review spelling of new and old words and to improve students' behavior in the classroom

 1. Students are divided into two or three groups depending on the number of students in the    classroom.
 2. The teacher will pick one vocabulary word from the "spelling bag" and will spell it out. 
     Eg. H-E-L-I-C-O-P-T-E-R. 
 3. Those students who know the word will raise their hand.
 4. The teacher will only select those students who raise their hand to say the answer  
 5. If the word is right, that team will get a point.
 6. The team which gets more points will win.

4. Spelling detective: 
I recommend to carry out this activity when students feel more or less confident with their spelling words, for example, as a review for a spelling test of right before moving to a new a spelling list.
 1. Write on the board a enumerated list of no more than 10 spelling words. 
 2. Let students read and focus on this list for 1 minute.
 3. Ask students to close their eyes for 15 seconds.
 4. Erase one of the words and rewrite it with an incorrect spelling (not very noticeable)
 5. Ask students to open their eyes and find the word with the 
incorrect spelling. 
 6. Students will write the word correctly on their own dry-erase board or in the notebook and 

     show it to the teacher.
 7. Continue playing until you have reviewed every word.

5.  Spelling Hangman: 
 1. Organize students in pairs. Each student will have a dry-erase board or a piece of paper.
 2. Each student will choose a random word but they will not tell it to each other ( the teacher  
     will tell students how many letters the word should have). Each student will draw as many   horizontal lines as letters the word they have chosen has.
 3. A small bag or box containing the spelling words will be placed on the table.
 4. The first student to begin playing will pick one word from the bag and say it aloud. 
 5. The other student will spell it out.
 6. If the student spells it out correctly, he will have the chance to say one letter he or she   
     thinks the word chosen by their opponent has. If the students spells the word incorrectly, 
     he or she will miss their turn without saying a letter.
 7. The student who guesses the opponent's word will win.

I will add more games and activities related to the teaching of spelling soon!


0 Comments

    Author

    My name is Beatriz Paternain. I am an ESL specialist who graduated in 2012 with a Master's of Education in TESOL and World Languages Education from the University of Georgia

    Archives

    May 2014
    March 2014
    December 2013
    October 2013
    April 2013
    March 2013
    February 2013
    December 2012
    November 2012

    Categories

    All
    Can/can't
    Collaborative Learning
    Digital Storytelling
    Drama Techniques
    Fluency
    Grammar
    Hardware
    Listening
    Phonics
    Present Continuous
    Songs
    Spelling
    TICs
    Vocabulary
    Websites
    Writing

    RSS Feed


Powered by Create your own unique website with customizable templates.